Side Dishes
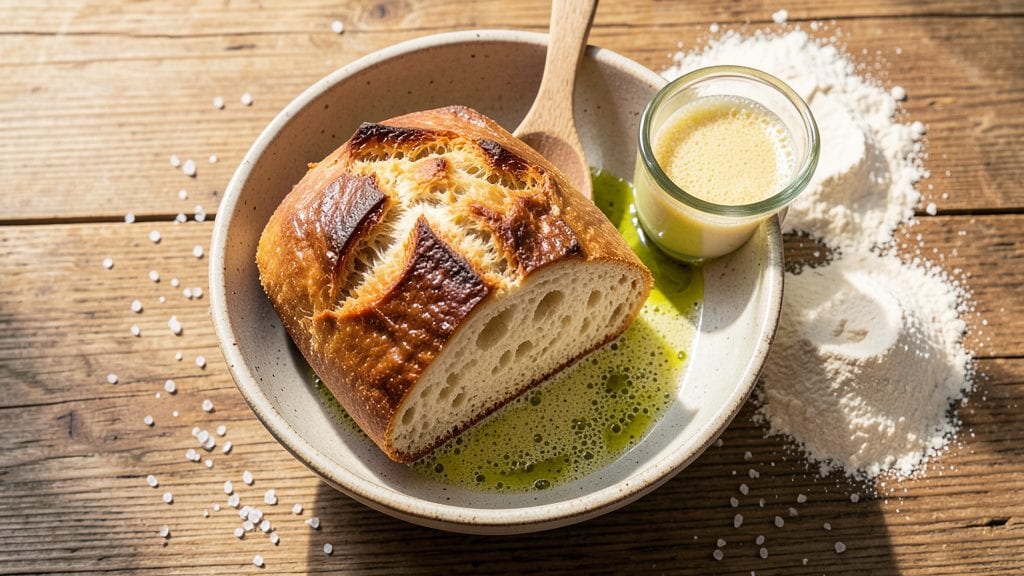
This grandmother bread recipe captures the warmth of a home-baked crust that’s easier than it looks—no-knead simplicity meets old-world tradition. The secret lies in letting the dough rise slowly, developing deep flavor while you go about your day.
I first learned this method from my grandmother, who swore by its foolproof technique for achieving that perfect golden-brown crust we all crave.
What makes this recipe special is its balance of tradition and convenience. You’ll need just five simple ingredients—flour, yeast, salt, sugar, and warm water—to create a dough that transforms into a tender, slightly crusty loaf with minimal effort.
The no-knead approach means no arm workout, just patience and time, which is why it’s perfect for busy weeknights or weekend baking.
By the time it emerges from the oven, you’ll have a loaf with a crisp exterior and a soft, airy interior that’s ideal for serving with butter, soups, or alongside any meal.
The aroma alone will transport you to childhood memories of home-cooked meals. This bread isn’t just a side—it’s the heart of the table.
Whether you’re feeding a family or treating yourself, this recipe delivers restaurant-quality results without the fuss. Let’s get started on creating a loaf that tastes like home.
Ingredients for grandmother bread
Five simple staples transform into a crusty, fragrant loaf with just patience and warmth.
| Ingredient | Amount | Notes |
|---|---|---|
| All-Purpose Flour 🌾 | 5 cups | Plus 1 tbsp for dusting bowl |
| Active Dry Yeast 🍞 | 2 ¼ tsp | Or 1 packet (7g) |
| Granulated Sugar 🍯 | 1 tbsp | Or honey for depth |
| Kosher Salt 🧂 | 1 ½ tsp | Adjust to taste |
| Warm Water 💧 | 1 ½ cups | 110°F (43°C) ideal |
| Extra-Virgin Olive Oil 🫒 | 2 tbsp | For dough and crust |
| Cornmeal 🌽 | ½ cup | For dusting baking sheet |
| Coarse Sea Salt 🧂 | 1 tsp | For sprinkling crust |
The flour is the foundation—King Arthur or Gold Medal brands work best for that tender crumb. Bulk bins at Whole Foods save money if you bake often. Yeast is your leavening powerhouse: check the expiration date—old yeast won’t activate properly. For the water, lukewarm is key (like bathwater). Too hot kills the yeast, too cold slows it down. I always use filtered water if my tap tastes metallic. The sugar feeds the yeast, but don’t skip it—it’s what kickstarts that magical rise. (And yes, honey works, but it changes the flavor slightly.)
No active dry yeast? Instant yeast works 1:1—just mix it right into the flour. Short on sugar? 1 tsp honey or maple syrup does the trick. Diamond Crystal kosher salt dissolves better than table salt, but use what you’ve got. The olive oil adds tenderness—avoid vegetable oil for that authentic bread flavor. For a richer loaf, replace 1 tbsp water with milk. And if you’re in a rush, use 1 extra tbsp yeast to speed up fermentation (but expect a slightly denser crumb).
Mix the dough, cover it, and let it rise at room temp for 12-18 hours—overnight is perfect. No refrigerator? Place the bowl in a warm oven with a cup of boiling water to keep it cozy. The dough doubles in size when ready—poke it gently; if it springs back slowly, it’s done. For storage, cool completely before slicing to prevent gummy bread. Room temp: 2 days in a bread bag. Fridge: up to 5 days wrapped tightly. Freeze: up to 3 months—thaw overnight at room temp.
Why You'll Love This Recipe
- I’ll be real: this recipe is my budget-friendly lifesaver. A few cents’ worth of ingredients stretch into multiple loaves, and the leftovers last days in the fridge. Plus, the yeast activates so quickly—no waiting around like some other recipes. Reliable, cheap, and always delicious. What more could you want?
- Five-Ingredient Magic: I swear by this recipe because it’s the kind of bread that makes you feel like a baker without the fuss. Just flour, yeast, sugar, salt, and water—no fancy add-ins, no stress. My kids think I’m a genius, and honestly? I just mix and let the yeast do the work.
- Golden Crust Promise: That perfect balance of sweetness from the sugar and the tangy warmth of the yeast? It’s the kind of flavor that turns a simple loaf into something you’ll reach for again and again. The crust gets just crisp enough to hold up, but it’s soft inside—like a hug in bread form.
- Breakfast to Dinner Hero: Between us, this bread is my go-to for toast in the morning, sandwiches at lunch, and even a quick charcuterie board when friends drop by. It freezes like a dream too—just slice it, wrap it, and reheat when you need it. No waste, all wins.
Step-by-step instructions for grandmother's bread
This no-knead method brings back the simple joy of homemade bread with minimal effort.
Activate the Yeast with Warm Water and Sugar
In a small bowl, combine the 1.5 cups warm water (about 110°F) with the 1 tbsp granulated sugar and 2.25 tsp active dry yeast. Let it sit for 5-10 minutes until frothy—this confirms the yeast is alive and ready to work. You'll see bubbles forming and the mixture expanding slightly. If it doesn't foam, your yeast might be dead, and you'll need to start over.
I always test the water temperature first with my finger—it should feel warm but not hot. Too-hot water kills yeast, while too-cold water won't activate it. This simple step sets the foundation for your bread's rise, so don't rush it. The sugar helps feed the yeast and kickstarts the fermentation process.
Mix the Dough and Let It Rest
In a large bowl, whisk together the 5 cups all-purpose flour and 1.5 tsp kosher salt. Add the yeast mixture and 2 tbsp extra-virgin olive oil, then stir with a wooden spoon until a shaggy dough forms. The dough will be sticky but shouldn't be wet—if it feels too loose, add 1-2 tablespoons flour at a time until it comes together.
Cover the bowl with a damp kitchen towel and let the dough rest at room temperature for 1 hour. This initial rest allows the gluten to relax and the yeast to begin fermenting. You'll notice the dough starts to pull away from the sides of the bowl and may develop small bubbles. This resting period is crucial—it prevents overworking the dough later and ensures a tender crumb.
Shape and Let the Dough Rise Again
After the first rest, lightly dust a clean surface with 1 tbsp all-purpose flour (the extra amount from the ingredients list). Turn out the dough and gently fold it over itself 3-4 times to strengthen the gluten. Shape it into a loose round loaf, tucking the edges under slightly. Place the dough seam-side up in a greased 9x5-inch loaf pan.
Cover the pan with the damp towel again and let the dough rise at room temperature for another 1-2 hours, or until it's puffed and reaches the top of the pan. The dough should feel springy when pressed gently with a fingertip. If your kitchen is cold, this may take longer—just be patient. The second rise develops that classic homestyle texture we're after.
Bake with Cornmeal and Coarse Salt
Preheat your oven to 375°F. Sprinkle 0.5 cup cornmeal evenly over a baking sheet. Turn the risen dough onto the cornmeal-covered sheet and carefully invert the loaf pan to release it. Sprinkle the top generously with 1 tsp coarse sea salt. Bake for 35-40 minutes until the bread is golden brown and sounds hollow when tapped on the bottom.
Here's the thing—don't open the oven during baking. The steam is what creates that beautiful oven spring and crisp crust. When you see the top turning golden and the internal temperature reaches 190°F (use an instant-read thermometer), it's ready. The cornmeal gives that rustic look while the coarse salt adds flavor and helps create a crisp exterior. Let it cool on a wire rack for at least 30 minutes before slicing—this prevents a gummy texture.
Pro Tips For Making Grandmother Bread
- Bloom the Yeast First: Skip mixing yeast directly into dry flour—it’s a rookie move. Instead, dissolve it in warm water (110°F) with a pinch of sugar first, then let it sit for 5-10 minutes until frothy. If it doesn’t bubble, your yeast is dead, and you’re wasting time (and dough).
- Measure Flour Right: Don’t scoop flour from the bag—it packs unevenly. Spoon it into a measuring cup, then level it off with a knife. A cup of packed flour is heavier than a scooped one, and your dough will turn out denser than it should.
- Don’t Rush the Knead: Five minutes of punching and folding won’t cut it. Knead until the dough springs back slowly when poked (about 8-10 minutes by hand). Over-kneading is easy to spot—it’ll feel tough and tear instead of stretchy. Stop just before it gets there.
- Use a Thermometer for Water: Warm water that feels "just right" to your wrist is too hot—yeast dies at 130°F. Aim for 110-115°F, or your dough will rise sluggishly or not at all. I learned this the hard way after waiting an hour for nothing.
Health benefits of this recipe
Whole Grain Power
This bread delivers complex carbohydrates for steady energy release, perfect for keeping you full between meals. A single slice provides about 15-20g of carbs, with a lower glycemic index than white bread thanks to the natural fermentation process.
The slow rise allows enzymes to break down gluten, making it easier to digest than commercial breads. 💪
Probiotic Benefits
The long fermentation creates natural probiotics that support gut health—similar to sourdough. These beneficial bacteria help balance your microbiome, which is why I notice my digestion feels better after eating homemade bread regularly. The process also reduces phytic acid, making nutrients like zinc and iron more absorbable.
Low-Fat Protein Boost
While not a protein powerhouse, this bread contains about 4-5g protein per slice from the flour and yeast. The gluten development during shaping creates a structure that's more satisfying than soft breads.
For extra protein, I sometimes add 1 tbsp vital wheat gluten to the dough—it doesn't change the texture but boosts nutritional value.
Rich in B Vitamins
Yeast fermentation produces B vitamins, particularly B6 and folate, which support energy metabolism and red blood cell production. The slow rise enhances these nutrients compared to quick breads. I always use active dry yeast for maximum vitamin content—it's more potent than rapid-rise versions.
Fiber for Digestion
With about 2-3g fiber per slice, this bread helps regulate digestion and keeps you satisfied longer. The fermentation process actually increases fiber bioavailability compared to raw flour.
For even more fiber, I recommend substituting 1 cup of the all-purpose flour with whole wheat flour—just be prepared for a slightly denser crumb.
Antioxidant Potential
While not as antioxidant-rich as whole grains, the olive oil used in this recipe adds vitamin E and polyphenols that combat oxidative stress. The slow fermentation process also preserves more antioxidants compared to commercial breads that use chemical leaveners.
For extra benefits, I sometimes add 1 tsp ground flaxseed to the dough. ✨
Nutrition facts
Frequently asked questions
Why does this recipe use a no-knead method?
The no-knead approach preserves the bread's natural flavor and texture by letting the dough develop slowly. This traditional technique creates a more tender crumb and deeper taste—just like my grandmother used to make! The long fermentation also makes the bread easier to digest.
Can I make this bread without a loaf pan?
Shape the dough into a round boule or batard instead. Place it on a parchment-lined baking sheet, score the top with a sharp knife, and bake at 425°F for 30-35 minutes. For extra crust, brush with water before baking. The flavor stays the same—just the shape changes!
What if my dough doesn't rise properly?
Check your yeast first—it should be fresh (test by dissolving in warm water with sugar). If the dough rises slowly, try a warmer spot (like a turned-off oven with a cup of hot water) or use 1 extra tsp yeast. Cold kitchens need more time—don't rush it! Patience is key for that perfect rise.
How can I add flavor variations?
Try adding 1 tbsp honey or 1 tsp dried herbs (like rosemary or thyme) to the dough. For extra richness, replace 1 tbsp water with milk. My favorite twist? Mix in 1/4 cup corn kernels for a sweet-savory surprise. The no-knead method handles these additions beautifully!
Can I freeze this bread?
Yes! Cool the bread completely, wrap tightly in plastic, and freeze for up to 3 months. Thaw at room temperature overnight. The texture stays fresh—perfect for busy mornings. Just avoid freezing sliced bread, as it can become crumbly.